
Our quilt group meets every Tuesday from 10:00 to 1:00 and it would be impossible to have a learning opportunity every week. This last Tuesday, the 14th of April, we learned how to make the Tuscany Village. This is the center block for the upcoming 2 more borders to be added. The June 2009, McCalls Quilting Magazine, has the pattern. The next 2 patterns will be in August and October.
This is my take on the pattern and how I instructed the ladies that day. Of course, quilting is such a long term, solitary activity that it is up to you to make the process enjoyable and find out what fits your personality best. The instructions in the magazine suggested you cut everything out at once, I'm not big on doing everything all at once on my quilt patterns. I think in case I make a mistake, I haven't messed the whole thing up and it will still be salvageable.
First you enlarge the patter and draw it out on freezer paper and fabric.  Here are the lovely ladies of the Northeast Quilting Friends doing just that. It was so nice to see them engrossed in a pattern.
Here are the lovely ladies of the Northeast Quilting Friends doing just that. It was so nice to see them engrossed in a pattern. Next, I suggest you fold the fabric and loosely lay it out on your pattern. This gives you an idea how the quilt will develop and helps you to direct the eye around the quilt. There will be a lot of embroidery embellishing to be added later, so you can also use that to enhance your quilt. There is even hanging laundry-to hide mistakes!
be a lot of embroidery embellishing to be added later, so you can also use that to enhance your quilt. There is even hanging laundry-to hide mistakes! These are my preferred tools to use, a hand held iron and very sharp scissors. You need these to make the openings in the windows and doors nice and crisp. Also you will be putting the freezer paper on the right side of the fabric. This is totally opposite of some of you applique people
 , that would normally put the paper on the wrong side of the fabric. But, trust me, it works just fine.
very sharp scissors. You need these to make the openings in the windows and doors nice and crisp. Also you will be putting the freezer paper on the right side of the fabric. This is totally opposite of some of you applique people, that would normally put the paper on the wrong side of the fabric. But, trust me, it works just fine. Last but not least, you need to invest in a roll of parchment paper (Thanks Ruth!) or a teflon sheet that I'm using here. The tape from the freezer paper and the glue from the glue stick
  you use to make the openings, will stick to your iron, so you need something to keep your iron clean.
and the glue from the glue stick you use to make the openings, will stick to your iron, so you need something to keep your iron clean. Happy Quilting!
 quilt and a wedding ring quilt her mother also
 made. Ruth brought her
  Sun Bonnet Sue
 that her mother had
  made.
made.  from a cross stitch kit.
 It has been in Paducah and won a blue ribbon at the Kentucky State Fair.
 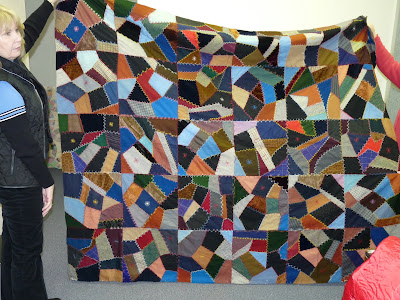 one from 1927
 and another from 1895.
  the hexagon quilt all hand stitched from silk. This is probably another Victoria era quilt. She also brought a
 chubby Sue!
  It was made for her by her "Aunt Rosy".
  this red work quilt and these
  baby quilts.
  lovely red work
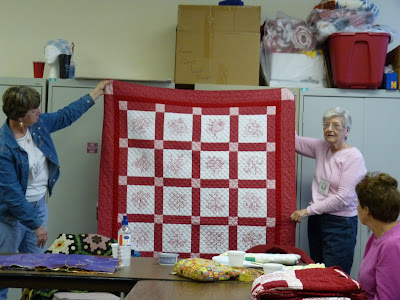 quilts and a baby quilt.

